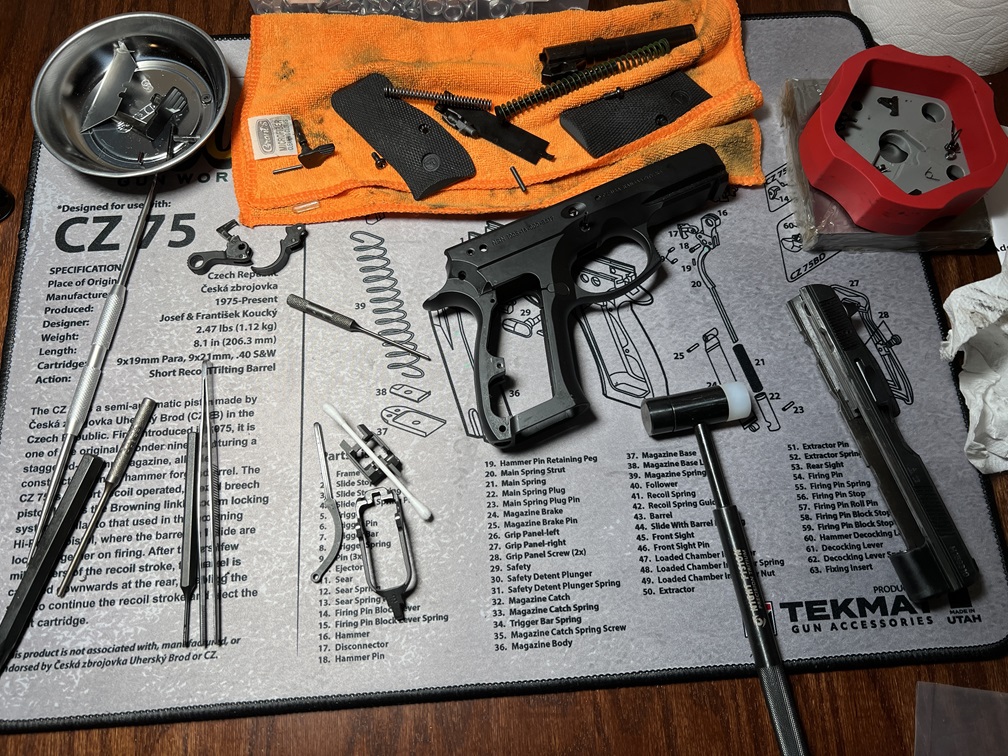
Today I decided to practice disassembling my CZ P-01 and polish some of the internals before I install the CGW Pro Package. It’s said that the decocker version is more difficult to put together compared to the version with a safety. Since I had some time and had already gathered the necessary tools, I thought I’d give it a shot before actually Cajunizing the gun myself. I used the following tools: Philips screwdriver, gunsmith hammer, bench block, tweezers, roll pin punches (3mm, 5/64″), 1/16″ starter and pin punches, a straight and 90 degree pick, tweezers, and 1000 & 1500 grit sandpaper for polishing. Plus since I’m not treading new ground here, I used this video from CGW for disassembly reference, and this website and this video for information on what parts to polish. This video is useful specifically for the sear cage assembly.
Disassembly was pretty straightforward. Mostly all of the pins came out easily. I should add here to always use some type of eye protection when taking apart firearms since there’s lots of springs and other stuff that can launch out if you’re not careful. Also make sure your workspace can contain any loose parts that might fly out and don’t work above carpet. I had some minor mishaps during disassembly. The lanyard loop of my gun shot out and hit the wall while I was removing the mainspring, and later when I did the slide, the firing pin ejected… Fortunately no damage done, and more importantly no lost parts! Keep your parts organized while disassembling too. There are many similar looking pins and springs, and keeping everything organized will greatly aid in reassembly.
For the pistol lower, I polished the hammer strut, trigger bar sides and contact points, and the bottom of sear cage. For the slide, I polished the rail surfaces, the edge that meets the hammer, and the firing pin block stop and the sides of the hole that it resides in. Since this was my first time polishing, I just lightly polished until smooth to the touch. I didn’t even get to a “mirror” finish since this is really just practice and gaining familiarity with the internals at this point.
Reassembly was a little trickier than the take apart. First of all, getting the floating trigger bar back in was pretty much impossible. Tension must be placed against the trigger spring pushing into the frame, while simultaneously adjusting for alignment with the pin holes, and hammering the trigger pin in. I gave up after several attempts at hammering the factory pin in and opted to just go ahead and install the CGW floating trigger pin which went in with little effort. As for the slide reassembly, the firing pin roll pin installation requires the firing pin to be almost flush with the slide surface. This seemed daunting, but placing the slide on the frame with the hammer down allows it to stay in place. I should also note that the firing pin roll pin for the P-01 is infamous for being an eventual point of failure for this gun. Upon inspection, mine still looked good. The gun itself is only < 4 months old, but I have had several hundred rounds through it with definitely more than a thousand dry fire pulls with snap caps.
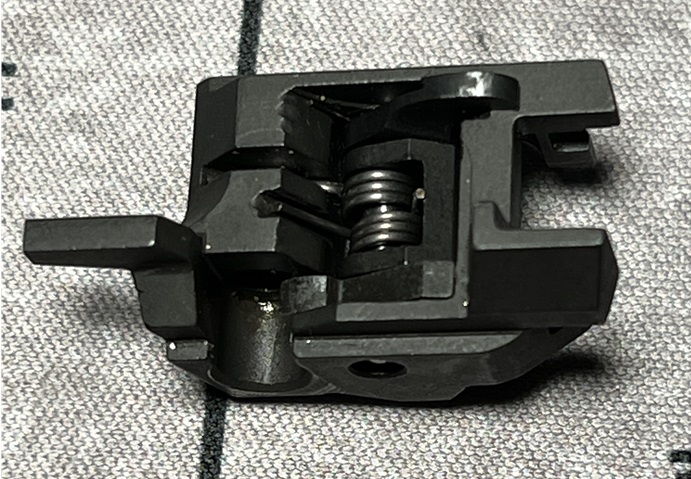
The sear cage reassembly was not as hard as I imagined. As long as you know the correct alignment and order of part installation, it’s fairly easy since not much force is needed. Some finger dexterity for dealing with small parts is required to put it together though. A straight pick and hook is strongly recommended for positioning the pieces and aligning the springs. I would strongly recommend watching the videos referenced above several times, as well as having a “before” picture of the sear cage for reference.

Overall this was a great experience, and I’m feeling pretty confident with installing the Pro Package when I decide to do it. I didn’t deal with it this time but I hear the hammer strut install can be a challenge, so looking forward to reporting back later!
Trigger pull weight before / after reassembly & polish (5 pull averages):
Before: DA: 11lb 7oz SA: 3lb 14oz.
After: DA: 11lb 9oz SA: 3lb 14oz (no perceptible change)
